Showing posts with label popular posts. Show all posts

Friday, December 4, 2009

Sleeping under the stars

012

I made my bed for this post peeps. This is BIG. HUGE. I hate making our bed. So you know it’s something I really want to show you. :) I have to tell you, this is one of my most favorite Christmas decorations I’ve ever done. And it’s somewhere you would never guess – our bed! (Now now now – get your heads out of the gutter! This is a PG blog.) :)

It all started with this photo I saw in the Pottery Barn catalog a couple months ago:

bedroom

I don’t know why, but I fell absolutely head over heels in love with the idea of greenery draped over the canopy rails and the little ornaments hanging down. How dreamy. For weeks I’ve been planning how I could do the same.

I thought I would just use some greenery I already had, but when all was said and done this week, I had little left to use. All I had was the skimpy dollar store garland, and I tried to beef it up by weaving some together, but it just wasn’t right. So because I wanted to do this so bad, I took another trip to Big Lots for the natural looking greenery from our mantel.

But then…THEN…during a quick stop to Lowes, I found IT. Real white pine greenery – in all it’s fabulous, silky fluffiness. It was gorg. I kept petting it and loving on it and putting it in and out of my cart. I’ve never bought real greenery for decor – I use cuttings from our tree and that’s it. So spending money on something that was going to dry up in a few weeks was like pulling my teeth.

BUT it was just $7 for 20 feet. And it was so soft and droopy and I was in lurve. I took it home. I started by halving the greenery, then draping it around the rails. I secured it here and there with floral wire:

026

I knew from the very start what I would use instead of the ornaments – my dollar spot lanterns from Target! I took them right out of the outdoor storage bench, and even kept the sand in them:

042 010

I used my little LED lights so there’s no danger of fire! (That’s the important part.) I can easily access them to turn them off, but they have so many hours of power, I may just leave them on.

I just tied up the lanterns with floral wire as well, and varied the lengths:

050021

Oh my goodness gracious holy canoly shut the front door. I. love. it.

017027

This is how it looks with the lights down low:

035

The tag says to mist the greenery with water to keep it fresh longer. I really hope it holds up – anyone know how long it will last?

023

Hubby loved it so much, he asked “Can we just leave it up all year?” Serious as a heart attack. Be still my heart, I love that man.

I’ve done a few other little things in our bedroom I’ll show you soon, but one last thing for tonight is the red “pillow” on the bed:

054

Please ignore the massive divots in the mattress. Those showed up pretty much immediately and they drive me mad! Taking pics of our bed gives me hives because of them. The poor red pillow is sinking into an abyss.

I wanted just a pop of red on the bed, and thought about buying a red pillow, but then remembered something I had seen somewhere in blogland – a pillow made out of a towel!:

044

I just took a towel, rolled it up, then rolled it up in the red silk (that I already had). To secure it, I stuck the fabric into the each end:

047

This is temporary, of course. But it has my mind going – with some batting to make it more substantial, and a bit more work, this could be a “real” pillow!

Our bedroom is one of our favorite rooms in the house – we just love being in there. So last year I started decorating just a bit for Christmas and it’s just dreamy. Hanging the greenery took very little time and total cost was $7. Totally worth it to sleep under twinkling lights. ;)

Sunday, November 22, 2009

The hardest easiest DIY wreath ever

002

OK, so I have seen this all over blogland for the past year, so it’s nothing new. I believe Eddie Ross did it first. Then I think I saw it over at Rhoda’s last year. And Chris shared hers last week. The more I saw them, the more I was mesmerized by them.

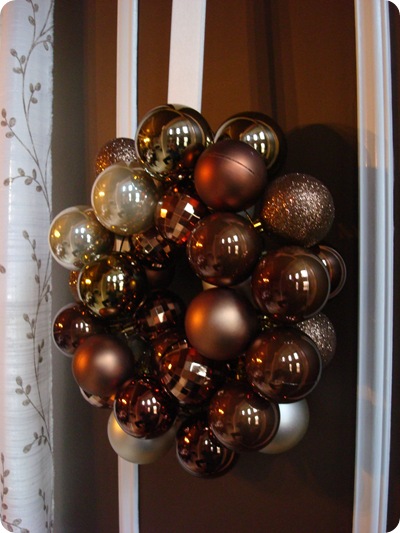
Then one of you lovelies (thanks Su!) suggested this wreath when I shared my Christmas dining table last week. I found a huge container of the bronze ornaments at Hob Lob on Friday for only $10, and the stars aligned and I knew it must. be. mine. 018

If you follow two simple pieces of advice this will be the easiest Christmas project you’ll do this year…listen to me carefully…I’m about to save you some major bad word saying and time.  :)

OK, when Eddie says to hot glue the little tops onto the ornaments before you start, this is not a suggestion. For reals. Oh yes, you can tug at the little tops and think “Pushaw, these are totally fine – they’ll hold great!”

Ummm…don’t listen to yourself. Listen to me. Listen to Eddie. You think you are saving time by not hot gluing, but you’re really going to add another unnecessary 20 minutes onto this project if you ignore him. And me.

It takes two seconds to hot glue one on, so just do it, as Nike would say.

All you need for this project is a wire hanger (insert Mommie Dearest jokes here) and your ornaments. You also want the hot glue, unless you’re gonna ignore me. And a wire cutter of some sort if you don’t want to fill up the whole length of the hanger with ornaments.

 020022 

This is the easy part – you just thread each ornament onto the wire, one by one. When you are done, twist the wire together to close the circle. Then arrange the ornaments so the wire is hidden as much as possible.

This is the next piece of advice you must not ignore – use the cheapest, thinnest wire you can find. I mean, seriously, my hubs must be taking his clothes to the Taj Mahal of dry cleaners cause OMG this stuff was hard to twist up to close at the end. 

I mean, like, insanely, ridiculously hard. It was thick wire – do not use thick wire. Use the thinnest wire hangers you can find, umkay? 

If you follow these two suggestions, I can promise you this will be the easiest, most beautiful wreath you’ve ever your set eyes on. If you chose to ignore, it will be the hardest, most beautiful wreath you’ve ever set your eyes on.  :)

My container of bulbs (shatterproof) had 50 in it, and I used about 15 from my Goodwill stash as well. So approximately 30-something ornaments per wreath for mine – they are small but that’s what I wanted.

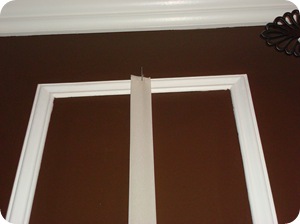
I hung them from cream ribbon (per Su’s suggestion!) in the two molding rectangles that flank our windows in the dining room:

011 006

If I can find a couple more in this color on the cheap, I’ll hang one from the little nails up there. If not, no one will ever notice them.  Except all of you. ;)

008

 012 016

One ended up being smaller than the other, but I was so over them at that point, I said forgetaboutit. Whateva. But they are gorg, so I got over it fast!

023

So again, if you follow my warnings advice – this is a quick and easy project! If not…well…don’t come cryin’ to me! OK, you can, cause I’ll cry with you.

Total cost for the two wreaths was $10 for the ornaments. Fantastic!

(Reason No. 329 I love Live Writer – I can add “gorg” and “pushaw” to my dictionary. Hellooo, those are words!)

Wednesday, November 18, 2009

A glam christmas table

025

OK, a few things before I start this post. I’m writing this one in Live Writer for the first time ever, and holy canoly, it’s freaking awesome! I love how easy this is to work with, and that it’s so easy to change and move photos! So this post may look a little different. (Let me know if it works OK for you!)

Second – YES, it’s a Christmas post. YES, I am decorating now. Well, this is the first of it, but hold on to your seats folks! I am loving the little bits of magic appearing in our house. I used to be the girl who groaned when I saw Christmas stuff inching it’s way out to the stores so early. But over the years, my glee at the sight of the decor grows more and more. I am quite sure this is due to our almost three-year-old. He is positively GIDDY, and it’s rubbing off. ; )

Because we aren’t hosting Thanksgiving this year, I figured I would go ahead and tackle the dining room, just because I’m excited to decorate it for the holidays with the new look.

I had the decor in my head, but I stopped midway when I found new inspiration at Goodwill, of all places. I got a small tub full of ornaments in the most gorgeous colors – colors I’ve never used for Christmas decor. They were sparkly coffee brown, creamy latte and copper tones and I fell. in. love.

So the new table was born in my head. : )

First, I started with my greenery. Greenery is my addiction this time of year. I’m not even kidding peeps, you’ll probably see it in every post for the next six weeks. I would fry it up and eat it for breakfast if I could. LURVE.

I just cut it apart with my wire cutters and stuffed it here and there so it filled in the empty spots on the centerpiece:

016

If you are new to these parts, you can see how I created the centerpiece here. : )

Then, I just filled it with the metallic ornaments here and there:

039

The shiny ornaments are looking gold in the pics, but they are really a gorg copper color. (You can also see me contorting myself to get a good picture in the reflection. Ha!)

I added some pine cones I had in my Christmas decor stash:

047

I had spray painted them with my caramel latte spray paint:

070

It is a loverly color. It just screams Christmas.

I gave the votive holders a tiny bit of bling by brushing on just a bit of glaze, then sprayed them with gold glitter spray:

031

It gives them look of strie, which I love.

I finished off the table with massive sparkly ornaments from Hob Lob in each bowl:029

060053

The ornaments were two per package, half off…so about $10 for all of them. The ornaments in the centerpiece were $7 at Goodwill, but I have a ton left I plan to use elsewhere. The rest of the items I had.

041

My obligitory night time shot:

062I am SO thrilled with how it turned out. Simple, but glam. Sigh. (I just realized every picture I decided to use is from this same angle -- sorry about that! Must be it's "good" side.)

The longest part of this project was waiting for the paint to dry on the votives and pine cones. Putting the rest of it together took about 20 minutes. Easy peasy Squeeeezaaaays!!

Has the Christmas decorating bug bitten you yet?

Thursday, November 12, 2009

Table runner wall art.

OK, well I kinda lied about the not mentioning molding for another month thing. It wasn't deliberate, I swear. This project just kind of came to me today and molding was the perfect touch to finish it off. Sorry. Not really. :)

So I was feeling the itch for a Goodwill trip today -- it's been about a week, and after that long, I start daydreaming about it, and getting hives at the thought of something totally fab and perfect and lovely that's there waiting for me rightthisminuteandI'mgoingtomissit!!

Whew. So I needed to go. I found a few goodies for under $10 -- the other items I'll show you soon. This one, I just couldn't pass up. It was a table runner, all beady and natural looking. I feel in lurrrrve.

I stood there with it in my hands staring at it, not baring the thought of putting it down. But I couldn't figure out where in the heck I would need such an odd sized table runner. It's only 31 inches long.

So I thunk and I thunk and I thunk and it hit me -- I knew just where it was going.

Over the toilet.

Yeah, that's right. For the longest time, this is what I've had over the toilet (such an ugly word) in our little room in the master bath:
Don't ask. I have no clue what I was thinking. I was thinking spa I guess? It didn't turn out well. And towels over the toilet? Um....that's just not good. I mean, we didn't use them, but still...

So I had a vision, and it turned out exactly how I had hoped! First, I just nailed the runner to the wall using little finishing nails and my hammer:
I used my nail sinker thing (the technical term is totally escaping me) to get them in close enough to the wall so you couldn't see them:
Most of them I was able to just push in with my finger.

I didn't take pics of the molding process, because I think you've seen enough of that over the past couple of weeks. ;) But I added some thin molding I had in the garage around the runner to finish it off:I spray painted the molding before I hung it, but it still wasn't just the right tone. So I just brushed some of my walnut stain right over the top of the wood, and now it matches perfectly!
Because I love it so stinking much, I took a ton of pictures, so bare with me:
I'm not sure what you would call the style of our bathroom, it's a little traditional, a little fancy, a little nature-inspired. But this works, no matter what it is. :)

How gorgeous would this be in a dining room -- in a set of three on the wall hanging horizontally? FAB!
The before again:
The much lovelier after:
Total cost? Four bucks baby. And it took about 30 minutes start to finish, to complete. All during nap time, with time to spare to watch my stories. ;)

I know, by the way, what many of you are thinking. Why worry about this little wall in this little room that no one sees? Well, we see it numerous times a day, obviously. And ummmm....well....have you read this blog? Helloooooo, it's me. ;)

I will decorate anything if I can do it for cheap!

Friday, October 30, 2009

Perfect.

I've been toying around with this post for quite some time now. I have held off because it shows a side of me I'm not so proud of. I decided to write it today because especially lately, more than usual, I've seen comments and posts here and there from bloggers about their home not measuring up...not being as beautiful as the next...not as perfect.

This big bloggy world is one that has brought much joy to my life. Much creativity. I have loved "meeting" all of you because of blogging.

But there are times when I click through some blogs and am not proud of my reaction. First, it's awe and glee from a great reveal or project.

Then, maybe a bit of wishing.

Then, do I dare say it...

Resentment? Jealousy?

I'm not proud of that. Not one bit, but it's the truth.

Let me be clear here -- I big fat LOVE our home. I would not trade it for any other. Because it is truly where our heart is. I have put my blood, sweat and tears into this house. We have raised out kids here and have created so many wonderful traditions and memories.

I cannot stress enough how much I adore it.

So maybe it's not the homes I see that give me the tinges of jealousy. Maybe it's the time some have to dedicate to their homes. Maybe it's the money some can spend on their homes. Maybe it's the way they describe their lives that seem so...perfect?

Maybe you have felt that way about this blog at times? I know it's possible and probably true, but I hope it's a fleeting feeling.

Our home is not perfect. Our life is not perfect. And a couple weeks ago, I got a big (soft) slap upside the head from God when I found out something about a blogger I visit every so often. It's a little known fact about this person, and let's just say I felt like a big fat ARSE after finding out the information. ;)

It was a message in flashing red lights that no one's life is "perfect." It may appear to be, but it never is.

And really, who wants perfect? Seriously, perfect is BOR-RING. Just like a house, it's so much more interesting with imperfections...the squeak on the floor that drives you crazy every time you step on that spot. The crack in the wall no one sees but you (but it still drives you mad). The dings in the drywall and baseboards from kids living in a home. All of us have squeaks and cracks and dings in our lives that make them not perfect.

I will spare you the details of my life, but because of my experiences, HOME means so much more to me than a building or a place for stuff. Most of my childhood was filled with wonderful memories and traditions. I never noticed the dings in the drywall, the creaks in the floors. (And your kids won't either.)

Then in high school, a series of events occurred that changed my outlook on life. I didn't have a home for quite some time. I lived with my best friend and her family for a summer. When it was time to go back to college, my dorm room was my only home. And that Thanksgiving was spent in an old, gross motel room, just my Mom and me.

It was one of the lowest days of my life.

At that time, Sarah McLachlan's song "Elsewhere" brought me comfort. I listened to it constantly. Part of the chorus from that song that still sticks with me:

I believe this is heaven to no one else but me.
And I'll defend it as long as I can be...

That song still makes me cry. ;) I am thankful for every moment of my life, because it's brought me where I am today.

It's not about the stuff or the house being perfect. It's about it being a home, in the emotional sense. Because of my past, a place to put down roots and to create memories for our kids means so much to me. So if you ever take anything away from this blog, it's that your home should be YOUR haven. I don't care what it looks like. I don't care if it's your dream home. Make it your dream home with what you have.

Even if that is just baking cookies, carving a pumpkin and playing with your kids on this Halloween weekend. Remember even those that feel they have very little are envied by someone. Be proud and love what you have and make it what you love and are proud of, in whatever way you can.

I hope you have a wonderful holiday weekend with your family. Thanks for listening to my deep thoughts today. :)

Wednesday, October 28, 2009

SURPRISE!!

Well hellooooo there!!

Isn't it FAB?? (If you are reading this in Google Reader you may want to click over.) I've been thinking about my redesign for AGES and am so totally, completely giddy with how it turned out!! Shannon at Eightcrazy Design is fan-freaking-tastic!


She took my inspiration -- my business card I had made up about six months ago -- and ran with it. It is so absolutely cool I can't stand it. (Squeal!) It's a perfect mix of sophisticated and fun and I'm thrilled. If you need any design services, I encourage you to check out Shannon's site.

Let me take you on a tour!

All the old stuff is still here, it's just organized better. (OH goodness, you know how I love organization!) Many of the items that were along the side are now up in the tabs along the top of the site.

I added specific tabs about advertising and consults -- check them out if you are interested! I highlighted some of the rooms in our house under the Our Home tab.I made the FAQ post a tab, so if you are new to TDC, many of your questions on projects I have completed are answered there.

Get Connected has links to my e-mail, Twitter and Facebook accounts and my Etsy site. Because you can't click the header to get "home" -- you can click the house button or go to the "Home" on the tab on the header to get to the front page of my site.

You can get my new blingy button (seen above) along the side as well. Isn't it awesome? (If you grabbed it early, the link is corrected now! I have a dot com address I haven't switched over yet.)

Some of my labels I had highlighted on my old site. Shannon has organized them so nicely all together along the side under Popular Catagories. These are some of my favorite labels, things like holiday posts, window treatments, beadboard, etc. I may add to these in the future, but you can still search my blog under What You Missed or check out past posts and my labels way down on the bottom left.

You can still see fellow bloggers in my blogroll down on the left as well. :)

I'm still tweaking some things but for now, it's done! And I'm in luuuuurve!! I hope you love it too! Thanks so much for the sweet comments!

P.S. And thanks to Beckie from Infarrantly Creative for introducing me to her BFF! :) (That would be Shannon.)

Monday, October 26, 2009

A dining room reveal!

Well, its not completely done, but I thought I would stop the torture and just show you already!! :)


I have long said there are three rooms I think you can do totally dramatic and fun. Your laundry room, powder room and your dining room. The first two because they are usually small and can take pretty much whatever color you want. The last, because I think dining rooms should have a little bling and drama, just because they can.


Drama it is:
The bench I will show you more of soon. It's drivin' me batty! Argh!! It's going to be gorgeous when I get it just right. (Dad is to the rescue this week -- I'll explain more later.)
The hutch redo I showed you here, and now I love that I can see what's inside:
The window redo I showed you here. I added molding, bamboo roman shades and made my new drapes:
Joann Etc. is STILL out of my trim to finish off the two head chairs. (Pout.) I was thisclose to driving 45 minutes today to get it from another store, but I held back. Have I mentioned I'm insanely impatient?

BUT I did have a couple lumbar pillows made for them, and those make me feel soooo much better about the unfinished chairs:
Aren't they adorable?!
I used scrap fabrics from the chairs and I adore them.

The table setting I showed here. I pieced together dishes from HomeGoods, Target and Pier 1:
The centerpiece is one of my favorite parts of the room, and it all started with a $4 mirror. You can see the how-to here.


Everything works so great with my cedar chest I redid months ago:
I showed you how incredibly annoying easy it was to reupholster dining chairs here. I used a brown faux silk on the backs, a creamy linen on the seats, and a pattern with all of the colors on the fronts:
Reason #7,839 I love my husband -- when I put the fabric on the chairs to show him what it would look like, I asked, do you think it's too much? His response -- "Maybe for some people, but not for us." LURVE that man.

I love to paint our ceilings, and I showed you how I did this one here.
It makes the molding POP!
The light. THE LIGHT I LOVE!! It was a knock of a Pottery Barn light I showed you here.
My version is from Home Depot and cost about $100 less (plus free shipping!).
I need to lower it just a couple inches, but for now, it's just fine. :)

My favorite time to enjoy this room is at night:
I'm not lyin' when I tell you I've had the chandy turned on every. single. evening, whether or not we're downstairs. I don't turn it off till we go to bed. It's so lovely to look at when we come down the stairs throughout the evening:


And because I'm a sucker for a good before and after, here's how the room looked years ago:

Then, a couple years later:

And last year...
Now:
Last year:
Today:
DRAMA!! I love it!! It is a dining room after all...so it's allowed. ;)

The winner of the ABCD Images giveaway is Erin @ Thimble Ambitions! Congrats Erin, email me and I'll get you in touch with Angie!