Showing posts with label lighting. Show all posts

Tuesday, October 20, 2009

The most beautiful light (and a winner!)

First of all, the winner (chosen by random.org) of the Joey and Chase Designs giveaway is number 17, Rebecca from Growing Up Our Style! Rebecca, please e-mail me and I'll connect you with Rachel!

If you have a few minutes to spare, go take a look at the comments from that giveaway. I asked you to name an event you would put on the bracelet and you did not disappoint. Many of you mentioned you were "boring" to put your wedding date, but I find that inspiring! Do you know how wonderful it was to hear from so many women who are happily married? That is a GREAT thing!

There were so many other amazing dates -- of course birthdates of children, but also birthdates of children who were lost. I had tears in my eyes so many times reading through those. And dates of parents who passed and other loved ones too. Dates of adoptions, dates of the discovery of cancer, of organ transplants...and even divorce! :) All are dates in your lives that changed you or started something new and wonderful, and it was inspiring to read.

On my bracelet, I am pretty sure I will get the numbers 11, 21, 08. The date of our first kiss, the date we got married and the date our son was born. All the most meaningful days of my life. :) Don't forget, Rachel has offered all of you a ten percent discount through this Friday, using the code "TDC10" at checkout!

So, now onto the light fixture. THE light fixture. I decided over the weekend I wanted the dining room redo DONE. I mean, there comes a point when I just can't take it "almost there" anymore.

Needless to say, I'm whooped. I mean, I kissed my husband last night just for insisting years ago that we get a hot tub. Uh, yeah. I have never enjoyed that sweet bliss of boiling hot water more than the past two nights. My body has been spanked by this room.

The chairs are done, but having the room together finally tonight, I'm going to tweak them just a bit tomorrow, and then I'll show you. Redoing those chairs was a fight of wills -- their will to break me in the process and my will to break them into a thousand pieces before I was done. ;) But, they are GORG. And dare I say, worth it.

The light installation kicked my butt today too. If you've never installed a light, the actual connecting of the wires is so easy it's just silly. The process up to that part can take a very. long. time. Making sure the n.i.p.p.l.e (that's what it's called and I don't want any weird searches!!) is the right length to hang the light just about puts me over the edge.

But again, it was so worth it I can't even tell you. I knew what I wanted for the room, and what I wanted was this ($400 plus shipping!) Pottery Barn light fixture:
And what I got was a cheaper, Home Depot version with free shipping:
I had a new medallion up, but it didn't work with the light fixture (the canopy didn't fit inside the medallion for anyone that knows anything about light fixtures), but it turned out to be a good thing. The one we had up is simpler, albeit a little small. (I have read to go smaller or larger than the light fixture, just not the same size. I have no idea -- but that's the consensus.)
This light was a serious splurge, even from Home Depot. But after the pain I went through with those chairs, I figured I deserved it. :) See how I reason??
The little candle things are yellowish and don't look right, so tomorrow I'm going to spray paint those white:
But oh dear Lord, I love it. Like, it was worth-the-pain-in-my-rear-putting-it-up, love it. It makes me soooo happy I installed a dimmer in here years ago.
But on all the way, it gives off a TON of light, which our old light did not. That drove me batty!

Isn't it magnificent?? This is shaping up to be one of my favorite rooms in our house. LURVE. I will be back tomorrow with the chairs. If I can move that is! :)

Thursday, June 11, 2009

Another lamp transformation!

Ohhhh I am sooo excited about this! I have been looking for new bedside lamps for, like, EVER. Like ohmygawd forever!

I found these for $20 each a month or so ago...and had to dwell on what I was going to do with them. I loved the shape of the bases and the shades, but the color was wrong for our bedroom:

The color was an easy fix. I spray painted them with my oil rubbed bronze paint (all the sudden I can't find this anywhere? Anyone else notice this?). It made a huge difference, but the shades needed something. Usually I cover my shades or add some bling to them, but I wanted to do something different.

It hit me. I used this:
(My large stencil I've used all over our family room.) And this:

(My stencil sponge.) I taped the stencil around the shade a couple times and did this:

Oh good Lord I love it! Here it is lit up:

Oh good Lord I love it more! Hubby's side, just because I love them so:


Seriously, it turned out exactly how I wanted. Squeal! I would have taken a pic of the whole bed with both of them but that would require making the bed. I do that about three times in a year, and this is not one of those times. Sorry 'bout ya.

I love how it looks different with the light on and off -- here's off:
And on:


I used regular paint (the wall color I had leftover) and a little bit of glaze. The glaze is not needed - I should have used more. (I wanted it to be a bit shimmery but it's not.)

Here's a peek at the old ones...

For more stencil fun:

Adding texture to your stencils.

How I stencil wall words.

P.S. I am eating a whole bag of popcorn.

P.P.S. Ummm...have you been to Hobby Lobby lately? Seen the Christmas decor out? Umkay. I'm so excited for the holidays I could pee, but seriously?

P.P.P.P.S.S. If you are not watching So You Think You Can Dance this season. GET to your DVR and set it for next week. Oh, how I love this show.

Tuesday, April 21, 2009

A lamp transformation

I have found the only bad thing about buying from consignment shops is the no return policy. (Consignment shops are different from thrift shops like Goodwill.) This is bad, bad news for me because I once and a while, I suffer from what you may call buyer's remorse. I call it, Oh-it's-gorg!-I-must-have-it-right-now-screw-the-price-it's-gorg!-who-cares-if-it-won't-work-I-love-it-remorse.

Hence this lamp purchase:

I know it's hard to see...I was so stinkin' excited to paint this thing, I didn't take a before picture. Here's the lamp shade, just to give you an idea:

When I saw the lamp at the consignment shop, I fell in love with the unique shape of it. It's kind of retro and was definitely looking it. It needed updated, so I spray painted the whole thing (it is ceramic and wood) black, found a drum shade for $9 and added some extra grosgrain ribbon from the bathroom project (below) to the top and bottom:

Yahoo, much better! I felt like it still needed something, and today I found big iron keys at the same consignment shop ($7 for five!) that I lurve. I tied one on with a ribbon and think I love it!:What do you think?

I found a $9 pillow for the garage sale chair and am going to shop the house for new accessories for the table:

Love it!

I loved the tassels on the old shade, so I took them off and added them to another lamp:

Perfect! The Nester would be proud!! :)
P.S. Did I mention I love it? Maybe not. I love it. (There, only 25 "loves" in one post.)

Thursday, March 26, 2009

How to install a dimmer switch.

If you read this blog waaaay back when, you know how much I luuuuv me some dimmers. I think lighting is one of the most inexpensive and easiest ways to create a mood in your home. And I just cannot express how much a dimmer switch will change the lighting in your room -- for as little as $7.

OK, now STOP shaking your head, thinking, "This Chick has gone and lost. her. mind. I cannot (and will not) do anything electrical."

Yes, you can! I swear. Just look at how easy it is.

If the light you are placing the dimmer on only has ONE switch that operates it, you'll need the single pole dimmer, like this one. This is GOOD because these are CHEAP -- less than $7. Dimmers come in a mad selection of styles and you'll pay more for more bells and whistles:

If your light is controlled by more than one switch, you will need the 3-way version. You need to look when you purchase -- the packages are almost identical.

When you open it up, this is what you'll see:

(Stop shaking. It's easy, I SWEAR.)
The only tools you should need are a Phillips head screw driver and a flat head screwdriver:

Go to the switch for the light you are changing out and turn it on -- first so you can tell if you get the right breaker and second, it's a real PITA when you've run down a set of stairs, through the house and to the garage, turned off the breaker, run back through the house, up the stairs and then realized YOU HAVE NO CLUE WHICH SWITCH YOU ARE WORKING WITH! Whew.

Go to the breaker box, and turn the switch to off:
Make sure the light is NOT working. Now you are free to use your flat head screwdriver to take off the switch plate. This is what you'll see:
Stop hyperventilating. It's going TO BE OK!!
Use your Phillips screwdriver to take the actual switch off the wall:
Then pull the whole switch out. There will be a wire connected to the green ground screw, and two wires connected to the switch -- either stuck inside it or tightened under the screws:
See that little bitty slat below? You'll want to use the flathead screwdriver and push it in while you pull the wire out of the little hole above it. (If your wires are in there. See above.)
Next, just follow the directions. Wrap the copper ground wire around the green wire on the dimmer:
Cap it off with the enclosed nut. Just stick it on the end and twist it. This ensures the wires stay connected and protected:
Then simply connect the other two black wires to the two left over wires. Twist together and twist the nut on:
Gently push all the wires back into the wall box:
That's it!! Told you it was easy. Screw the dimmer switch back onto the plate:
Go to turn on the breaker switch to make sure it is working. Then get completely sidetracked by your Decorating ADD and peruse the new Ballard catalog that just came in the mail:
Sorry. Make sure the light works:


Then go ahead and put the plate back on. Make sure all the little screws go the same way:
Oh, sorry. That's just me. I think I like this way better:
So many issues, so little time.

That's it! You are done!! I have installed dimmers in pretty much every room in our house. The kitchen: The dining room is a necessity!!
I have all of our ceiling fan lights on dimmers. Our master bath light is on a dimmer -- FABULOUS on dark mornings. All of our recessed lighting is on dimmers. I tell you what -- they say dimmers save on electricity and I believe it. We've been in this house five years and just last week changed out two recessed lights. They lasted FIVE years people!

You won't be disappointed! I challenge you to make this a quick and easy weekend project!

Disclaimer: MAKE SURE SURE SURE the breaker is turned off. Please!! :)

On a completely different note, I need to show some love for my friend Kimba:


I know many of us have struggled with the amount of time we dedicate to blogging --whether it be writing a blog or just being obsessed with looking at them! Kimba challenges all of us to unplug tomorrow from anything (like the computer!) that we feel is taking up a bit too much of our time.

I have made some changes of late that have made a BIG difference to us -- for example, I don't get on the computer in front of our son anymore. It has been a great change for us -- he was starting to hate the computer. ;) If you unplug tomorrow, share how it went for you at Kimba's on Monday.

Saturday, September 27, 2008

Lampshade tutorial.


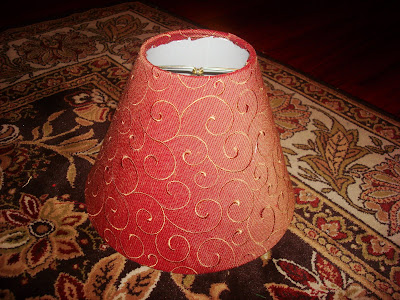
I have a lampshade that has been bugging me for months -- I wanted to recover it but couldn't find the perfect fabric. Tonight, at ten minutes to closing, my Bub and I ran into Hobby Lobby (my second trip today, yikes!) and I found the PERFECT fabric! And trim! In less than ten minutes! Yayeeeee!


So I took pictures as I recovered this time just to prove how easy it is! Before:


You really don't need much fabric, just depends on the size of the shade. I lay mine out and trace it (using chalk) -- giving extra room so the fabric wraps around:


Use a hot glue gun to secure the fabric. You can cut little slits every couple inches so the fabric wraps easily:


Taadaa!! But it still needed something...


Trim! I found the perfect match:


If you've seen my family room, you'll understand how perfect the swirlys (swirlies?) are! I loved it so much, I did the little shade in the kitchen:

I'm so excited! My cat, however, is thoroughly unimpressed:

That looks says, "You add this crap to my food bowl and I will pee on your drapes, lady."