So I was feeling the itch for a Goodwill trip today -- it's been about a week, and after that long, I start daydreaming about it, and getting hives at the thought of something totally fab and perfect and lovely that's there waiting for me rightthisminuteandI'mgoingtomissit!!
Whew. So I needed to go. I found a few goodies for under $10 -- the other items I'll show you soon. This one, I just couldn't pass up. It was a table runner, all beady and natural looking. I feel in lurrrrve.
I stood there with it in my hands staring at it, not baring the thought of putting it down. But I couldn't figure out where in the heck I would need such an odd sized table runner. It's only 31 inches long.
So I thunk and I thunk and I thunk and it hit me -- I knew just where it was going.
Over the toilet.
Yeah, that's right. For the longest time, this is what I've had over the toilet (such an ugly word) in our little room in the master bath:
 Don't ask. I have no clue what I was thinking. I was thinking spa I guess? It didn't turn out well. And towels over the toilet? Um....that's just not good. I mean, we didn't use them, but still...
So I had a vision, and it turned out exactly how I had hoped! First, I just nailed the runner to the wall using little finishing nails and my hammer:

 Most of them I was able to just push in with my finger.
I used my nail sinker thing (the technical term is totally escaping me) to get them in close enough to the wall so you couldn't see them:
 Most of them I was able to just push in with my finger.
I didn't take pics of the molding process, because I think you've seen enough of that over the past couple of weeks. ;) But I added some thin molding I had in the garage around the runner to finish it off: I spray painted the molding before I hung it, but it still wasn't just the right tone. So I just brushed some of my walnut stain right over the top of the wood, and now it matches perfectly!
 Because I love it so stinking much, I took a ton of pictures, so bare with me:
 I'm not sure what you would call the style of our bathroom, it's a little traditional, a little fancy, a little nature-inspired. But this works, no matter what it is. :)
How gorgeous would this be in a dining room -- in a set of three on the wall hanging horizontally? FAB!
 The before again:
 The much lovelier after:
 Total cost? Four bucks baby. And it took about 30 minutes start to finish, to complete. All during nap time, with time to spare to watch my stories. ;)
I know, by the way, what many of you are thinking. Why worry about this little wall in this little room that no one sees? Well, we see it numerous times a day, obviously. And ummmm....well....have you read this blog? Helloooooo, it's me. ;)
I will decorate anything if I can do it for cheap!
I spray painted the molding before I hung it, but it still wasn't just the right tone. So I just brushed some of my walnut stain right over the top of the wood, and now it matches perfectly! Because I love it so stinking much, I took a ton of pictures, so bare with me:
 I'm not sure what you would call the style of our bathroom, it's a little traditional, a little fancy, a little nature-inspired. But this works, no matter what it is. :)
How gorgeous would this be in a dining room -- in a set of three on the wall hanging horizontally? FAB!
 The before again:The much lovelier after:
 Total cost? Four bucks baby. And it took about 30 minutes start to finish, to complete. All during nap time, with time to spare to watch my stories. ;)
 I know, by the way, what many of you are thinking. Why worry about this little wall in this little room that no one sees? Well, we see it numerous times a day, obviously. And ummmm....well....have you read this blog? Helloooooo, it's me. ;)
I will decorate anything if I can do it for cheap!


 This project would take half the time if you just used regular wall paper you love, but I wanted something with texture and I already had it. :) Can't beat that folks. I got my textured, paintable wallpaper at Lowe's for around $12.


 I started with a vinyl rub on from Uppercase Living. If you haven't heard about them, I wrote about the products
 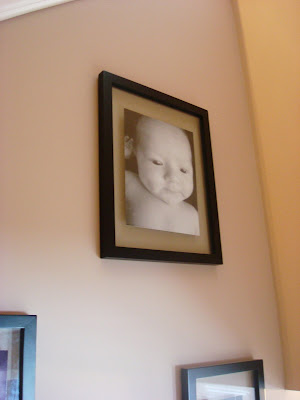 I started taking my own pictures of our son when he was itty bitty -- the baby who NEVER cried screamed like a banshee for his first professional pictures -- so that day I went home, stripped him down, laid him on black fabric, and shot away. I did this often his first year or so:
 **This does not work with a two-year-old. :)
 It's one of the first things you see when you walk into our home and it's one of my favorite spots. I just added a new one today, and may add one more, but I don't know. I like all the "white space":
 I always suggest this kind of wall for weird hallways and stairways. I think it is a beautiful way to deal with awkward spaces like this. The pictures cost me nothing because I print them at home, on regular paper. Love it!
 These are $79 for the set. What a fantastic deal (dripping with sarcasm). You have GOT to be kidding me. Really? For pictures of forks and spoons? Do you KNOW how easy this would be to do? And it would be even prettier if you did it yourself. I know, I know, it would take a little more time. (All of about ten minutes more than ordering them online.)
